Monday, September 30, 2013

Pizza Rustica

For my final post of this year's MoFo, I proudly present my adaptation of a dish I used to make when feeling particularly domestic, ambitious, hungry, and/or pregnant (usually some combination of the above). A quick glance at The Vegetarian Epicure's original recipe reveals a truly colossal gut bomb featuring a pound of ricotta, half a pound of mozzarella, a cup of Parmesan, and five (!) eggs, in addition to the 3/4 cup butter called for by the pie crust. In those days we were young, foolish, and apparently untroubled by and/or impervious to the effects of cholesterol in gigantic quantities and never thought a thing of it, but I should note that a little of this very rich pie went a long way. It also made great leftovers, so one pizza could easily be fed off for a couple of days with something simple like a salad or steamed greens on the side.

I hadn't thought about this recipe in ages, but in planning this year's theme it was one of the first things on my "to do" list; I finally got around to it one cloudy afternoon, when there was a nip in the air and my kitchen fairly cried out for me to bake something. (Since the oven was on, I also made an apple-pear crisp with a wheat germ and walnut topping; watch this space.) For my herbivorous update I replaced the prototype's dairy cheeses with homemade tofu ricotta, and store-bought vegan mozzarella and parmesan. I added sautéed mushrooms because I didn't have olives, upped the quantity of onions, garlic, and other seasonings, and blew off the eggs entirely because let's face it: who needs 'em except hens? I also used frozen pie crusts because I couldn't be arsed to make my own pastry, but if you're inclined to haul out the rolling pin please go right ahead. The end result felt as indulgent as its inspiration, and - just as in the old days - one slice was enough for any reasonably hungry person. To satisfy honor and my personal credo of "eat the rainbow," I also made a green salad with roasted sweet potatoes and maple/tahini dressing, which was really all that was necessary to complete the meal.

On a more personal note, I have to say that of all the things I've cooked this month, this dish probably brought me closest to that fondly remembered sensation of being just grown up enough to have my own kitchen, but still enough of a kid to find that fact a bit giddying. Autumn is proverbially a season of nostalgia, and as this pie baked away in the oven I was reminded of the fall before my first son was born, which I largely spent reading, napping, and puttering around the kitchen and pantry of the lovely second floor apartment we'd moved into the previous summer. It was nice to think of that time, and to reconnect with how I felt about cooking back then. Most of all, it was an enormous pleasure to recreate this recipe and serve it to my (now rather enormous, in both size and number) family. I am so glad to have taken this culinary trip down memory lane, and to have revisited those old, dog-eared, tamari-stained cookbooks for Vegan MoFo; something tells me they might not be returning to the back of the bookshelf just yet.
Peace. 

Pizza Rustica
Ingredients
~ Pastry for a two-crust pie (I used frozen)
~ 1/2 lb. mushrooms, sliced
~ 1 large bell pepper, julienned
~ 1 tbsp. olive oil
~ 1 medium onion, diced
~ 4 cloves garlic, minced
~ 1 tsp. each: salt, oregano, basil, marjoram
~ A few generous grinds of black pepper
~ 1 14 oz. can diced fire-roasted tomatoes, drained
~ 1/4 cup tomato paste
~ 1 14 oz. package firm tofu, drained and pressed
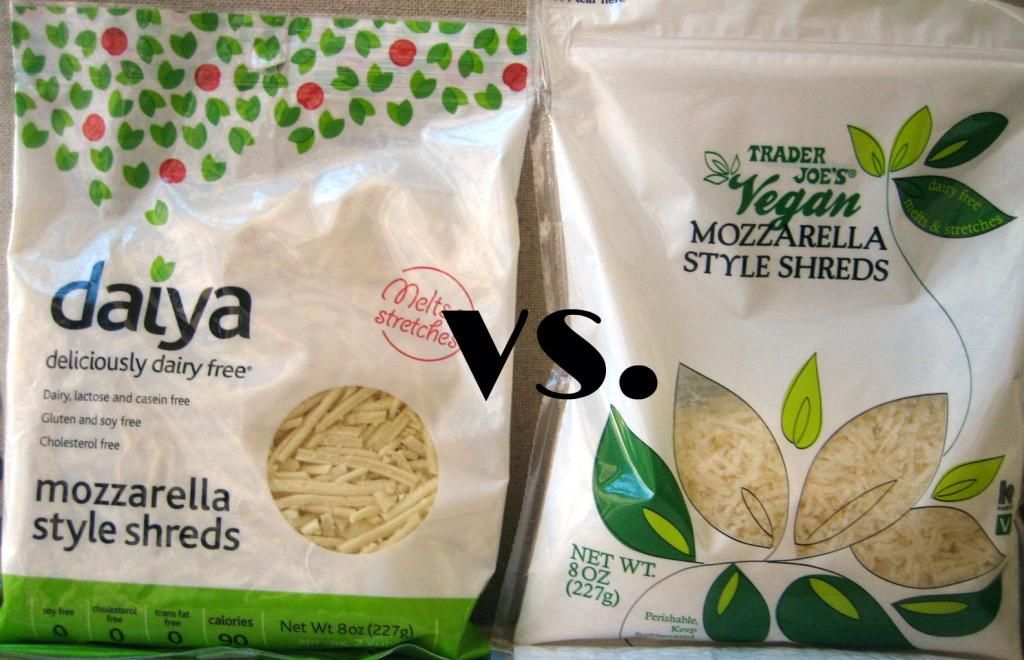
~ 1.5 cups shredded vegan mozzarella (I used Daiya)
~ 1/2 cup vegan parmesan
~ 1/4 cup nutritional yeast
~ 1 tsp. each: salt, oregano, garlic powder
~ 1 cup chopped, fresh parsley
~ Juice of one lemon

Directions
~ Preheat the oven to 425 degrees fahrenheit.
~ Coat a large, deep skillet with cooking spray and cook the mushrooms over medium-high heat for about 10 minutes, until browned and fragrant. Sprinkle with salt, transfer to a plate, and set aside.
~ Add the julienned pepper to the skillet and cook over medium-high for 7-10 minutes; transfer to a plate and set aside.
~ In the same skillet, sauté the onion in the olive oil over medium heat for 5-7 minutes, until they are softened but not brown. Add the garlic and dried seasonings and cook another minute or two.
~ Add the drained tomatoes and tomato paste, stir to combine, and continue cooking for about 15 minutes, until thickened. Remove from heat, stir in the cooked mushrooms, and set aside.
~ In a food processor, combine the tofu, vegan mozzarella and parmesan, nutritional yeast, oregano, garlic powder, fresh parsley, and lemon juice. Blend until smooth.
~ Now we're ready to assemble our pie! 
~ Line one pie crust with half the tofu ricotta mixture and press down firmly with a spatula or the back of a large spoon. Top with half of the tomato sauce and half of the cooked, julienned bell pepper, again pressing down firmly (you really want to pack these layers densely).
~ Repeat these layers and top with the second crust, being sure to seal the edges well. 
~ With a sharp knife, make a couple small gashes in the crust, and bake at 425 degrees fahrenheit for 40-50 minutes (ovens vary wildly, so keep an eye on it; cover with foil if it starts to brown too much).
~ Remove from oven and allow to stand for 30 minutes before slicing.

Sunday, September 29, 2013

Mexican Corn and Cheese Bread

Another corn bread, this time a Moosewood recipe that was new to me (see my longstanding attachment to Anna Thomas' version), but I'm glad I gave it a shot. The original was easily veganized by substituting vegan milk and cheese for their dairy analogues, agave syrup for honey, and some extra baking powder for Mollie Katzen's single egg; I also added a little chili powder and smoked paprika to make things more interesting. The finished product was absolutely yummy, and this is one I will definitely make again; I think it would also be good interpreted as muffins, maybe with some chopped jalapeños to increase the "Mexican" factor. Best of all, it cooks up in under 40 minutes, which is especially nice on a weekday afternoon; served alongside a big bowl of pea soup, this was another unqualified MoFo win!

Mexican Corn and Cheese Bread
Ingredients
~ 1/4 cup olive oil
~ 1/2 cup onion, minced fine
~ 1 cup cornmeal
~ 1 cup all purpose flour
~ 4 tsp. baking powder
~ 1 tsp. each: salt, chili powder, smoked paprika
~ 1 cup corn kernels (fresh or frozen)
~ 1 cup plain, unsweetened soy milk
~ 2 tbsp. agave syrup
~ 1/2 cup vegan cheddar cheese (I used Daiya)

Directions
~ Preheat the oven to 375 degrees fahrenheit and coat a bread pan with cooking spray.
~ Heat the olive oil in a small skillet and sauté the onion over medium heat 5-7 minutes, until soft and golden.
~ In a mixing bowl, sift together the corn meal, flour, baking powder, salt, and chili powder. Add the corn kernels and stir to coat (this will give them some "grip" in the batter).
~ In a separate bowl, combine the soy milk, agave, and vegan cheddar; add the sautéed onions (making sure to include all of the olive oil) and mix thoroughly.
~ Make a well in the center of the dry ingredients and combine thoroughly.
~ Transfer batter to your waiting bread pan and bake in the center of the oven at 375 degrees fahrenheit for 30-35 minutes, or until brown and firm on top.
~ Allow to cool in the pan for about 10 minutes before slicing.

Saturday, September 28, 2013

Hearty Pea Soup

"Soup, soup,
A tasty soup, soup..."

Today's cauldron of earthy goodness is slightly adapted from the Hearty Pea Soup in Laurel's Kitchen. The original recipe was one I'd never tried before, and quite frankly it would never have occurred to me to put split peas, white beans, barley, and potatoes in the same pot. But you know what? It totally works, and the result is a delicious, filling meal in a bowl that reminds me of the autumn/winter soups my mom used to make (only better, since most of those contained some unfortunate animal).

The prototype is already vegan, so my main changes were to sauté all of the vegetables - rather than just the onion - and a few additional spices. I also substituted broth for the original's water, increased the barley, stirred in some fresh parsley at the end, and used canned white beans instead of dried because A. I was short on time and B. I am lazy.

My one caveat if you make this - and I really hope you will - is that it takes a while to cook, even if you're using canned beans. So wait until you've got a bit of time and embrace the opportunity to hang out in the kitchen, listen to music, chat with your partner and/or kids and/or dog and/or cat, and maybe even make some bread to go with this hearty, comforting soup. You'll be glad you did!

Hearty Pea Soup
Ingredients
~ 2 tbsp. olive oil
~ 1 large onion, diced
~ 2 large celery stalks, diced
~ 2 large carrots, diced
~ 4 cloves garlic, minced
~ 1 cup green split peas, rinsed and soaked
~ 1/2 cup barley
~ 1 tbsp. basil
~ 2 tsp. each: thyme, dill
~ 1 tsp. each: celery seed, marjoram
~ 1/2 tsp. salt (optional; I find the recommended broth salty enough)
~ Several generous grinds black pepper
~ 2 bay leaves
~10 cups "no chicken" broth
~ 1 14 oz. can white beans, including liquid (I used cannelini)
~ 2 medium potatoes, diced into small cubes
~ 1/2 cup chopped, fresh parsley

Directions
~ In a large, deep pot, sauté the onion in the olive oil over medium heat for about 5 minutes.
~ Add the celery, carrots, and garlic, and cook  another 5-7 minutes, stirring occasionally.
~ Add the split peas, barley, and dried seasonings and stir to coat.
~ Add the bay leaves and broth, cover, and bring to a boil. Reduce to a simmer and cook, covered, for about an hour, stirring occasionally.
~ Add the white beans and the potatoes and cook another 30 minutes or so, until the split peas and barley are quite soft. Add a bit more broth or water if the soup is getting thicker than you'd like.
~ Fish out the bay leaves, stir in the fresh parsley, and serve. This soup is so substantial that a salad or even just a hunk of bread is all you need for a filling meal. (Also be aware that it thickens as it sets, so you might want to add a little water when you heat up the amazing leftovers.)

Friday, September 27, 2013

Stuffed Eggplant

The whole Moosewood oeuvre has really been getting a workout around here lately, and today's post is no exception. This recipe is partly a conflation of two separate Katzen approaches to the mighty aubergine (Stuffed Eggplant Hippie Style and Mimi's Stuffed Eggplant), and partly what I think of as a "good parts" reinvention. As usual, a perusal of the originals shows a preponderance of multiple cheeses; I decided to ignore the whole cottage cheese and/or ricotta thing this time and use a combination of nutritional yeast and Daiya cheddar shreds instead. Beyond that, I basically picked and chose elements from each recipe that appealed to me (mushrooms from one, bell pepper from the other, walnuts instead of sunflower seeds, etc.) and added the seasonings that seemed appropriate. So although this dish is really more of an homage than a proper adaptationit still feels true to the spirit of its inspiration; the Hot Tuna cooking soundtrack added to the pleasingly nostalgic atmosphere.

Stuffed Eggplant
Ingredients
~ 2 largeish eggplants
~ 2 tbsp. olive oil
~ 1 large onion, diced
~ 1 red bell pepper
~ 4 cloves garlic, minced
~ 1/2 lb. mushrooms, chopped
~ 1 tsp. each: salt, thyme, marjoram, dill, chili powder, smoked paprika
~ 1 tbsp. hot sauce (I used Frank's)
~ 1 cup roughly chopped walnuts
~ 1/2 cup nutritional yeast
~ 2 cups shredded vegan cheddar cheese (I used Daiya)
~ 1/2 cup + 1 tbsp. wheat germ
~ 1/2 cup chopped fresh parsley

Directions
~ Preheat the oven to 350 degrees fahrenheit and coat a baking sheet with cooking spray.
~ Slice the eggplants in half lengthwise and scoop out the insides, leaving about 1/4" of skin. Set the skins aside and chop the flesh (eeeww) into approximately 1/2" bits and reserve.
~ In a large, deep skillet, sauté the onion in the olive oil over medium heat for  about 5 minutes. Add the bell pepper and garlic and cook about 5 minutes more.
~ Add the mushrooms and dried seasonings, cook another 5 minutes, and stir in the chopped eggplant innards. Cover the pan and continue cooking about 10 minutes, stirring occasionally to prevent sticking.
~ Add the hot sauce, walnuts, and nutritional yeast and stir to combine. Mix in the vegan cheddar in smallish increments, stirring with each addition until it melts.
~ Stir in 1/2 cup of the wheat germ and the fresh parsley and cook a minute or two more. Remove from heat and allow to rest a few minutes.
~ Now - and this is a direct quote - "stuff the [eggplant] shells generously and with love." (Seriously.) Sprinkle the tops with the remaining tbsp. of wheat germ and a dusting of paprika and bake, uncovered, at 350 degrees for 35-40 minutes.
~ Remove from the oven and allow to rest about 15 minutes before slicing and serving. (Be forewarned that even with set-up time, this may still be a somewhat messy - but delicious - process; just chill out and enjoy!)

Wednesday, September 25, 2013

Sundays at Moosewood-Inspired Chick Pea Curry

Today's offering is adapted from the "spicy chick peas" in Sundays at Moosewood Restaurant. To be absolutely truthful, they're not really very spicy, but that's fine; the tart tamarind and the slightly sweet tomato sauce make a nice contrast that's pleasing to a wide variety of palates (read: kid friendly). My main changes were the addition of a few extra spices, the substitution of coconut oil for the ghee or canola called for in the prototype, and some fresh cilantro stirred in at the end for a "green" note

I also found  - as with many recipes I've made during this project - that this dish took a lot longer to cook than the 20-30 minutes specified. (Maybe it's a hippie thing; just let the food hang out and do what it needs to?) But no matter: the finished product was well worth the wait, and it made amazing leftovers. Served with brown saffron rice, mashed sweet potatoes, and noochy kale, this made a particularly satisfying and healthy dinner.

Moosewood-Inspired Chickpea Curry
Ingredients
~ 1 cup hot vegetable broth
~ 4 tsp. tamarind paste
~ 1 tbsp. coconut oil
~ 1 large onion, diced
~ 6 cloves garlic, minced
~ 2 tbsp. grated ginger
~ 1 14 oz. can diced, fire-roasted tomatoes w/chilies
~ 1 tsp. each: salt, chili powder
~ 1/2 tsp. each: coriander, cayenne
~ 3 14 oz. cans chickpeas, drained
~ 1 cup chopped, fresh cilantro

Directions
~ Combine the hot vegetable broth with the tamarind paste and set aside.
~ In a large, deep skillet, melt the coconut oil and sauté the onion over medium heat for about 5-7 minutes, until softened but not browned.
~ Add the garlic and ginger and cook another minute or two before adding the tomatoes and dry seasonings. Mix thoroughly and continue cooking another 10-12 minutes.
~ Remove from heat, allow to cool slightly, and puree with an immersion blender (or in a food processor) until smooth.
~ Return the sauce to medium-high heat; add the chickpeas and the broth/tamarind paste mixture and stir to coat.
~ Bring just to a boil, and lower the heat to simmer. Allow to cook for about 50-60 minutes, stirring occasionally, until the sauce has reduced to a thick glaze. (Your mileage may vary, so just keep an eye on it.)
~ Stir in the chopped cilantro, remove from heat, and serve with rice and hot chutney.

Monday, September 23, 2013

Carrots in a Gentle Sauce


Desdemona’s domestic partner here, stepping in for a guest post. It’s been a delicious pleasure following her adaptations of classic hippie cookbook favorites this month; even as an omnivore (and world-ranked cheese enthusiast) back in the day, I found the gut-bombing quantity of dairy in many of those vegetarian recipes somewhat alarming. Eating the veganized results of MoFo 2013 has been even more fun.

I am blessed to have twin daughters, now 20, who have been vegetarian since they were 10. If you do some higher math, you’ll find they’ve been veg for half of their young lives – how about that? And why did they do it? Because they didn’t want to eat animals, that’s why. At that time, their mother and I were omnivores, and although we respected their ethical commitment, we worried that their diet wouldn’t give them the nutrition they needed (this was especially true of one daughter who was a pretty picky eater; I well remember leaning on her to eat the occasional piece of fish to keep herself alive). But neither kid ever budged in the slightest, and their health never suffered for the lack of anything that didn’t go into their growing bodies. When I look back now and think of all the years they quietly, patiently stuck to their ethical guns while I stubbornly and happily refused to examine where my own food came from or what it meant (and made tired old jokes like “I’m a vegetarian who makes an exception for meat!”), I feel somewhat abashed, but mostly proud to have such smart, thoughtful, grounded children. As teenagers, they followed Desdemona and me on our happy herbivorous path, and are now well-informed, cheerfully non-preachy vegans; the kind you’d love to invite to a party. They inspired us and we inspired them, and that’s a two-way generational bond that remains deep and strong.

Anyway, what ultimately made their vegetarian ways healthier, happier, and more sustainable was their increasing interest in preparing food: they really grew up in the kitchen, marrying their beliefs with the creativity, fun, and generosity of spirit that make for great cookery and fond table fellowship with family and friends. For a number of years, we spent summers in a beautiful sublet in the Bloor/Dufferin area of Toronto, with thousands of books, about 200 plants, a pair of eccentric cats, skylights, and a third-floor loft kitchen with an island counter, skylights, and lots of trees around to keep us company. In the backyard were some truly feral blackberry bushes from which we made quantities of cobblers when the berries ripened in August. Our favorite activities were reading, modeling Sculpey clay, making Shrinky Dinks, going to the splendid community park at the end of the block (where we splashed in the "pee pool," jumped around on the climbing equipment, and dug bottle caps out of the dirt), buying silly things in the dollar store in the mall across the street, and cooking.

Our two go-to cookbooks at the time were by Mollie Katzen and Ann Henderson, who beautifully adapted vegetarian fare for children: Pretend Soup (for preschoolers and up) and Honest Pretzels (for ages 8 and up), both of which provided some repeatable favorites as well as seemingly endless new opportunities for kitchen adventures. So one night when we needed a side dish for barley risotto, I thought immediately of “Carrots in a Gentle Sauce,” one of the delightfully simple concoctions from Pretend Soup. We don't have the book here, and there were no previews available online, but a few texts to the girls established its essential ingredients, and the results were as pleasing as I remembered. So whether you are helping children learn to cook, looking for something simple to accompany a meal, or just trying to use up some carrots, enjoy this adaptation of a blast from my family’s past.

Carrots in a Gentle Sauce
Ingredients
~ 2 tbsp. Earth Balance
~ 2-3 cloves garlic, minced
~ 1 lb carrots, sliced on the diagonal 1/4" thick
~ 1 tsp. each: salt, marjoram, tarragon
~ 1 cup "no chicken" broth
~ Juice of 1 large orange

Directions
~ In a large, deep skillet, melt the margarine and sauté the garlic over medium heat for about two minutes.
~ Add the carrots, salt, marjoram, and tarragon; stir to coat, and continue cooking for a few minutes more.
~Add the orange juice and broth, mix thoroughly, and cover the pan. Cook for 20 minutes, or until the carrots are tender, stirring occasionally.
~ Remove the lid, raise the heat to high, and cook another 5 minutes, stirring, until the liquid has reduced to form a glaze.
~ Serve hot to hungry people and/or bunnies, big and small .

Saturday, September 21, 2013

Brown Saffron Rice

This is almost a straight veganization of the saffron rice in The Vegetarian Epicure, Book Two, substituting cashews for the original's pistachios, and brown basmati rice for its paler analogue. The brown rice means a longer cooking time, but the added chewiness is nice in combination with the nuts and raisins. The slight sweetness of this preparation makes it a perfect foil for tart, salty, and/or spicy dishes; I served it with a tomato and chickpea curry (watch this space), and the balance of flavors was lovely.

Brown Saffron Rice
Ingredients
~ 1/4 cup plain, unsweetened soy milk
~ 1/2 tsp. saffron threads
~ 2 tbsp. Earth Balance
~ 1/3 cup chopped cashews
~ 1/3 cup chopped raisins
~ 1.5 cups brown basmati rice, rinsed and soaked for 30 minutes
~ 1 tbsp. sugar
~ 1 tsp. salt
~ 1/4 tsp. cinnamon
~ 3 cups vegetable broth

Directions
~ Warm the soy milk and dissolve the saffron in it.
~ In a medium-large saucepan, melt the margarine and sauté the cashews, raisins, and rice over medium-low heat for several minutes.
~ Add the sugar, salt, cinnamon, and broth. Cover the pot, raise the heat to high, and bring just to a boil. Lower the heat to a simmer and cook for 35-40 minutes, or until all the liquid is absorbed.
~ Fluff with a fork and serve immediately.

Thursday, September 19, 2013

Moosewood Cream of Broccoli Soup


Here's another time-honored Moosewood favorite from the Ithaca collective's  first cookbook. I added a few extra seasonings, and soy milk and pureed cashew cream stand in for their dairy analogues; based on the rapturous response to The Vegetarian Epicure's carrot soup a couple weeks ago, I also stirred in a little sherry at the end. Despite these alterations, the finished product was very like my memory of Mollie Katzen's original recipe. Although I didn't bother reserving and steaming a cup of the broccoli florets for garnish, I do urge you to include the tamari (or Bragg's) for that ineffable, countercultural something.

Cream of Broccoli Soup
Ingredients
~ 2 tbsp. Earth Balance
~ 1 medium onion, chopped
~ 2 cloves garlic, minced
~ 1 green bell pepper, diced
~ 1 tsp. each: thyme, basil, dill
~ 1/2 tsp. white pepper
~ 1/4 tsp. cayenne
~ Pinch of nutmeg
~ 1 lb. broccoli, chopped
~ 2 large scallions, chopped
~ 2 bay leaves
~ 1 tbsp. tamari, or Bragg's liquid aminos
~ 3 cups vegetable broth
~ 3 cups plain, unsweetened soy milk
~ 1/2 cup cashews, soaked and drained
~ 1/3 cup nutritional yeast
~ 1/4 cup sherry (optional, but nice)

Directions
~ In a large, deep pot, melt the margarine and sauté the onion over medium heat for about 5 minutes.
~ Add the garlic, bell pepper, and dry seasonings; continue cooking about 5 more minutes.
~ Add the broccoli and stir to coat; cook for another few minutes and then add the scallions, bay leaves, tamari, and vegetable broth. Cover the pot and raise the heat to high; bring just to a boil, and then reduce to a simmer for 15-20 minutes.
~ In a blender or food processor, puree the soaked, drained cashews with the nutritional yeast and about a cup of the soy milk until smooth; add this mixture to the soup pot along with the remaining soy milk. Remove the bay leaves and puree the whole business with an immersion blender (or transfer to your food processor) until creamy.
~ Continue cooking over low-medium heat another 5-10 minutes, stirring occasionally, until hot but not boiling. In the last few minutes, add the sherry if using and cook another minute or two. Serve hot with some good crusty bread.


Tuesday, September 17, 2013

Upside Down Vegetable Cheesecake


"We shall o'erturn it topsy-turvy down.
Yet all is well, yet all our joints are whole."

Today's offering is my quixotic conflation of two recipes from The Enchanted Broccoli Forest: Savory Vegetable Cheesecake and Vegetable Upside-Down Cake. Both of these casseroles are pretty ambitious in their own right, requiring several steps and reasonably long prep/cooking times; they also call for a lot of eggs and dairy. (In their original incarnations, these recipes call for 6 cups of various cheeses - ricotta, mozzarella, cheddar, and Parmesan - a pint of milk/yogurt, 5 eggs, and nearly a stick of butter. Yes, you read that correctly.) My primary challenges in combining these two dishes were 1. getting a sufficiently firm, sliceable texture for the cheesecake layer, and 2. gauging how long the assembled casserole would need to bake to ensure success when it's inverted on a platter: the crucial juncture necessary to the "upside down" part of the title.

I had made the Vegetable Upside Down Cake in the past with success, and wasn't worried about replacing the one egg called for in Mollie Katzen's recipe for the topping. It was my own hubris in deciding to make the dish in layers - first the cheescake, then the vegetables, and finally the biscuit layer destined to become the bottom of the finished product - that had me spooked. In the end, I opted to forge ahead and figure it out when the time came; if the casserole came out of the oven looking like it wouldn't survive the flipping over step, we'd just slice it with the biscuit layer on top. No harm; no foul.

Now, while I was theoretically resigned to this idea, I'll admit that it would have been disappointing because I really wanted this to work, dammit! So I took my time, devoting an evening to the process, and making sure to allow for longer baking and setting-up times as necessary. And in the end - O, frabjous day! - my faith and patience were rewarded because it TOTALLY WORKED. Not only did it work, it turned out easily, sliced beautifully, and was delicious and spectacular enough to qualify for center stage at a dinner party or holiday meal (it is definitely showing up on this year's Thanksgiving table).

So there you have it. Be bold! Be confident! Be fearless! Be vegan! 

The “Cheesecake"
Ingredients
~ 14 oz. firm tofu, drained and crumbled
~ 12 oz. firm silken tofu
~ 2 cups vegan mozzarella
~ ½ cup vegan parmesan
~ ½ cup nutritional yeast
~ 2 tbsp. cornstarch
~ 1 tsp. each: tarragon, oregano, onion powder, salt (if you like/have it, use black salt for "egginess")
~ 1/2 tsp. white pepper
~ Dash nutmeg
~ 1/2 cup plain, unsweetened soy milk
~ Juice of one lemon

Directions
~ Preheat the oven to 375 degrees Fahrenheit and coat a 9 x 13” casserole generously with cooking spray.
~ Combine all ingredients in a food processor and blend until smooth.
~ Spread the mixture evenly into your very well-greased baking dish and bake, uncovered, for 20 minutes while you make...

The Vegetables
~ 2 tbsp. olive oil
~ 1 onion, chopped
~ 3 cloves garlic, minced
~ 2 large carrots, grated
~ 1 red bell pepper, diced small
~ 2 large zucchini, sliced thinly into quarter moons
~ 4 large scallions, sliced
~ 1 tsp. each: salt, basil, marjoram, thyme
~ A few generous grinds of black pepper
~ ¼ cup flour

Directions
~ In a large, deep skillet, sauté the onion in the oil over medium-high heat for about 5 minutes.
~ Add the garlic, carrots, and bell pepper and continue cooking 5 minutes more.
~ Add the zucchini, scallions, and spices; cook another 10-12 minutes, until the vegetables are soft.
~ Mix in the flour, stir to coat, and cook another minute or so before removing from heat.

The Topping
Ingredients
~ 1.5 cups all purpose flour

~ 1 tbsp. each: baking powder, sugar
~ 1 tsp. each: salt, dill
~ ½ tsp. each: baking soda, smoked paprika
~ 1 1/4 cup plain, unsweetened soy milk, mixed with 1 tbsp. apple cider vinegar
~ 2 tbsp. olive oil

Directions
~ In a mixing bowl, sift the dry ingredients together.
~ In a separate bowl, combine the soy milk/vinegar mixture with the oil and mix together.
~ Make a well in the center of the dry ingredients and add the wet ingredients. Mix until just combined, being sure to scrape the bottom and sides of the bowl.

The Assembly
~ Remove the casserole from the oven and distribute the cooked vegetables atop the cheesecake layer.
~ Carefully top with the batter. This might be a bit fiddly, so be patient; I found it best to do this with my hands and pat the batter evenly into place.
~ Return to the oven and bake another 30-35 minutes, until the topping is browned and a toothpick inserted in the center comes out clean.
~ Remove the casserole from the oven and allow to rest for 15-20 minutes.
~ Now comes the fun/scary/exciting part! Find a platter that is just slightly larger than your casserole, and place it face-down over the top. Grasping the edges of casserole and platter with both hands, swiftly and confidently flip the whole business over and set down on a flat surface. Speed is of the essence here during the "upside down" part of this casserole, because as Mollie Katzen's original recipe tells us, it will smell your fear.
~ Once you've inverted your cheesecake, allow the upside down casserole to rest for another 5 minutes so the cheesy layer can pull completely away from then baking dish. If you've used a clear glass dish (highly recommended) you can watch this process as it happens: SCIENCE!!!
~ Carefully remove the casserole from the finished cheesecake and take a few moments - and pictures! - to bask in the glory of your accomplishment before slicing and serving to your admiring family and/or friends.


Sunday, September 15, 2013

Vegetarian Epicure Cornbread


Well, we're halfway through the month (?!), and this is about as near to a straight recreation as I've come during this project. Anna Thomas' basic cornbread from The Vegetarian Epicure was my go-to recipe for ages, and it's really good. The only changes I've made to the original are to substitute non-dairy versions of milk and butter and a "flax egg" (1 tbsp. of flaxseed beaten with 3 tbsp. water) for the chicken variety; I also added apple cider vinegar for a "buttermilk" effect. Despite the presence of 1/4 cup sugar, this bread isn't overly sweet, and makes a particularly fine vehicle for margarine while still hot. It also toasts nicely, but be aware it can be a bit crumbly, so a toaster oven is the safest bet.

Vegetarian Epicure Cornbread
Ingredients
~ 1 cup all purpose flour
~ 1 cup cornmeal
~ 5 tsp. baking powder
~ 1 tsp. salt
~ 1/4 cup sugar
~ 1 cup plain, unsweetened soy milk
~ 1 tbsp, apple cider vinegar
~ 1 tbsp. ground flaxseed beaten with 3 tbsp. water
~ 1/4 cup melted Earth Balance (or other vegan margarine)

Directions
~ Preheat the oven to 375 degrees fahrenheit and coat a bread pan with cooking spray.
~ Combine the milk and apple cider vinegar in a small bowl or beaker and set aside for 5 minutes. Add the flax/water mixture and melted margarine and whisk together for about a minute.
~ In a mixing bowl, sift together the flour, cornmeal, baking powder, salt, and sugar. Make a well in the center, add the milk mixture, and mix until just combined..
~ Transfer the batter to your baking pan, smooth the top with a rubber spatula, and bake at 375 degrees for 30-35 minutes, or until a toothpick inserted in the center comes out clean.
~ Allow the cornbread to cool in the pan for about 5 minutes before turning out, and for a few minutes more before slicing.

Friday, September 13, 2013

Barley Risotto with Pesto, Beans, and Shrooms

"On an autumnal Sunday afternoon
A pot of barley, pesto, 'shrooms, and Thou - 
Beside me, mixing drinks in the kitchen - 
And the kitchen is Paradise enow."

This is an autumnal spin on risotto, with barley stepping in for the traditional arborio riceI love the earthiness of the mushrooms and mild, creamy white beans here, but there's lots of room to play around if you like: roasted winter squash or sweet potatoes, chopped greens, sautéed zucchini, chickpeas, or some combination would all work nicely. 

One advantage to using barley is that it takes longer to cook than rice; it's also more forgiving, so you can leave it to bubble away on its own for a few minutes at a time without having to stir it constantly. The finished product retains a nice, slightly chewy "bite," and its winning combo of protein, whole grain, vegetables, and the superhero that is nutritional yeast makes for a particularly yummy example of a healthy, one-dish meal.

Barley Risotto with Pesto, Beans, and Shrooms
The Pesto 
Ingredients
~ 2 cups chopped, fresh basil leaves
~ 1 tsp. each: salt, oregano
~ A  few generous grinds of black pepper
~ 4 cloves garlic
~ 1/2 cup toasted pine nuts
~ 3/4 cup nutritional yeast
~ 1/2 cup water
~ Juice of 1 lemon

Directions
~ Combine all the ingredients in a food processor and blend until smooth. Set aside.

The Risotto 
Ingredients
~ 3 cups sliced mushrooms (I used baby bellas)
~ 1 14 oz. can white beans, including liquid
~ 2 tbsp. olive oil
~ 1 large onion, chopped
~ 1.5 cups barley
~ 1 cup white wine
~ 5 cups hot "no chicken" broth

Directions
~ Coat a non-stick skillet with cooking spray and cook the sliced mushrooms over medium-high heat until browned and fragrant (about 5-7 minutes). Stir in the white beans with their liquid and a sprinkle of salt. Continue cooking another 5 minutes or so, until the beans are a bit softened and the liquid slightly reduced. Remove from heat and set aside.
~ In a large, heavy-bottomed pot, sauté the onion over medium heat until soft and translucent but not browned; about 10 minutes.
~ Add the barley and stir to coat; cook another few minutes, until it gives a off a toasty aroma. Pour in the wine and cook, stirring, until it is mostly absorbed.
~ Begin adding the broth by cupfuls, stirring occasionally until the barley soaks up the liquid. This process takes a bit longer than it does with rice, so you can step away from the stove for a few minutes between stirs.
~ After the first two cups of broth, stir in half the prepared pesto. Continue adding broth every 5-10 minutes or so, until you have achieved a creamy, "risotto" like texture (this should take about 35-40 minutes total, but your mileage may vary).
~ Stir in the remaining pesto and the mushroom and white bean mixture. Combine thoroughly, continue cooking about 5 minutes more, and serve hot.